Brown bag schedule

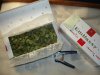
My last few harvests were drying in 2 days which i cured and did open jars but guess not often enough to find them losing flavor. This round has a brick at stake so I want this done right.
To slow the transition from dry to cure I want to brown bag them for short cycles every day. The brown bags i have are too small and might get turkey bags so that i don't have to cut stems open.
Heres the framework:
Goal 7 days dry til jar
70>68>65 degrees
60%>67% RH
might throw frozen jugs in the tent for temp n humidity

Day 0 Chop @ 0:00, bag 10 minutes at 6,12, and 18:00.
Day 1 0:00, 6,12, 18:00, bag for 15 mins
Day 2 0:00, 6,12, 18:00, bag for 20 mins
Day 3 0:00, 6,12, 18:00, bag for 30 mins
Hopefully enough moisture for 6 days
Day 4 @ 0:00 bag til 12:00
take out for 30 mins ck moisture if crispy jar for few hours then bag 12:30-0:00
Day 5 @ 0:00 open bag for 30 minutes
Bag till 12:00 then chop the stems to fit in jar leaving lid cover half the opening Or bag over open jar. Check at 18:00 and 24
Day 6 @ 0:00 close jar til 8:00,16 open for 15 minutes
Day 7 @ 0:00,8,16,24 open for 10
Day 8-14 open jars 2ce>1nce a day for 5 minutes or just burp.
Obviously not exactly how ill do it but i figure more little waves will smooth things out, what dyall think?
 

Roger A. Shrubber

Well-Known Member
it seems overly complex. why not just buy a cheap cool mist humidifier and put it on a timer to run a few minutes daily in your drying room to slow it down instead of the elaborate bag/unbag program?
 
My point of doing a more elaborate schedule is to 'land the plane' smoothly so that it can dry slow with plenty of burps. My Rh was 60-65% last few drys and stems were snapping small n large Lost lot of flavor and potency
Won't a humidifier create potential for mold and heat up the tent?
 

Roger A. Shrubber

Well-Known Member
might create the potential for mold but won't heat up the tent, they're basically small swamp coolers.
you said your last few harvests were drying in 2 days...thats way too fast. thats why you're losing flavor and potency. it should take at least 5 days to get dry enough to jar. 7 or 8 would be better. if your RH is in the mid to low 60s, either your temps are too high or you have way too much air moving over it, maybe some of both.
 

OldMedUser

Well-Known Member
I've posted about the way I slo-dry and cure on a couple forums but don't hear about many trying it out. It is fussy and it's easy to screw up and get mould with 3 - 5 weeks of slow drying. It still clumps up into a big lump for the first week or so as it gets burped for another month or more before it's dry enough to smoke nicely in a pipe or bong but still not dry enough to break up well in a grinder for joints.

I only cut enough colas at one time that will take an hour to manicure really good so a small mixing bowl/hour is all I can do. I have pretty severe arthritis that affects my whole body but my fingers and toes get it bad with needle sharp pain very often and cramps like charley horses that force me to move the affected digit back in place manually. That happens mostly when doing something needing more manual dexterity like trimming or tying my damn shoes. Gotta speed up and stop picking out every little bit of sugar trim. :)

I sit right here in front of my computer watching TV while I snip away with my Fiskars until I have around 100g of wet bud to put in a wax paper lined box so it's filled right up. I use the empty boxes that cigarette tubes come in perforated on the top, front and back only. Each box is pre-weighed with the strain, gross/tare weights and date/time. I even put on the little half sticky note before getting the tare wt. to be accurate. Sucks being a Libra sometimes. :)

Trimboxes01.JPG

They sit up along the gas pipe in my basement where it never gets warmer than about 60F with a small ozone air fresh machine runs all the time to prevent mold growth in the basement itself. Twice daily airing and loosening with noting the weight every few days ensues. When they get where they are only losing a gram/day it's time for the jars.
I use plastic tobacco cans for my jars as nothing sticks inside and there are no shoulders like inside a mason jar so the clump of pot slides right out onto parchment paper and a bit of airing. Easily breaks up with minimum handling then slid right back into the can.

Trimboxes02.JPG

The secret to this method is having enough pot left over from the last harvest to see you through. :)

The smoke is so smooth and tasty that it's well worth the wait.

Bowl-O-Buds.jpg

:peace:
 

Bareback

Well-Known Member
I've posted about the way I slo-dry and cure on a couple forums but don't hear about many trying it out. It is fussy and it's easy to screw up and get mould with 3 - 5 weeks of slow drying. It still clumps up into a big lump for the first week or so as it gets burped for another month or more before it's dry enough to smoke nicely in a pipe or bong but still not dry enough to break up well in a grinder for joints.

I only cut enough colas at one time that will take an hour to manicure really good so a small mixing bowl/hour is all I can do. I have pretty severe arthritis that affects my whole body but my fingers and toes get it bad with needle sharp pain very often and cramps like charley horses that force me to move the affected digit back in place manually. That happens mostly when doing something needing more manual dexterity like trimming or tying my damn shoes. Gotta speed up and stop picking out every little bit of sugar trim. :)

I sit right here in front of my computer watching TV while I snip away with my Fiskars until I have around 100g of wet bud to put in a wax paper lined box so it's filled right up. I use the empty boxes that cigarette tubes come in perforated on the top, front and back only. Each box is pre-weighed with the strain, gross/tare weights and date/time. I even put on the little half sticky note before getting the tare wt. to be accurate. Sucks being a Libra sometimes. :)

View attachment 3811335

They sit up along the gas pipe in my basement where it never gets warmer than about 60F with a small ozone air fresh machine runs all the time to prevent mold growth in the basement itself. Twice daily airing and loosening with noting the weight every few days ensues. When they get where they are only losing a gram/day it's time for the jars.
I use plastic tobacco cans for my jars as nothing sticks inside and there are no shoulders like inside a mason jar so the clump of pot slides right out onto parchment paper and a bit of airing. Easily breaks up with minimum handling then slid right back into the can.

View attachment 3811340

The secret to this method is having enough pot left over from the last harvest to see you through. :)

The smoke is so smooth and tasty that it's well worth the wait.

View attachment 3811341

:peace:
Morning omu, sorry to hear your a arthritis suffer like myself ( pa ) and my wife ( ra) it really sucks at times, well most of the time.
I really like a slow cure and like your style of cureing, I'll give this a try in the cure cycle. Also what do you use to keep those fiscars clean. Have you tried the spring loaded sewing shears, I use both but I like the ones in your pic the most, just easier the use longer.
And those are tasty looking mmmmmmm meds, should help you relax a little. ;-) :weed:
 

OldMedUser

Well-Known Member
I use coconut oil on my scissors. Cheap little pocket knife to scrape the goo off them wipe in a 4" x 1" piece of paper towel that has been folded twice with a thin film of said oil smeared in the center so you stick the blade in there and wipe firmly. Takes it off quicker than any other substance other than say ISO and is good for your skin unlike ISO. A quick, light wipe with a dry piece of paper towel to remove any excess oil then back at it.

I never wear gloves when I trim either and don't get gooey fingers. Coconut oil again. Little dab on my left index finger then run the thumb and first three fingers together to smear a light film of it around, little under the nails and it soaks in so you fingers aren't all oily. I always hold the colas by the stem, quick snip off everything sticking out from it and working from the bottom snip out each bud and let it drop on the parchment paper covering my trim area. Then I pick up each bud by it's stem and fine trim it and toss it in the bud pile, Sugary snips and popcorn go in the oil pile and everything else with no sugar goes in the compost pile.

When done for the evening the scissors get cleaned really well so they are ready for next time. Dried on goo is much harder to clean off next time you need them.

Just put in a $600 order for grow stuff that friends will pick up in the city for me next week. Got myself a lightly used Trim Pro Unplugged for $350. Half what a new one costs because the guy that bought it cut holes in the bottom of the catch pan so it can sit on a 5gal pail. I'd do that myself. He traded it in after his first 20 plant crop for a $3000 powered trimmer. I'm thrilled! Now I need some colas to make it work. :)

Got plants to feed and water so C'ya L8r

:peace:
 

Dan Drews

Well-Known Member
Just an FYI - don't forget the trichs are oil soluble. If you handle the buds with oily fingers you run the risk of rubbing off (dissolving) some of your trichs. I know you said you hold by the stem which is god, but it's important to remind beginners NOT to handle buds with oily fingers.
 

Bareback

Well-Known Member
Just an FYI - don't forget the trichs are oil soluble. If you handle the buds with oily fingers you run the risk of rubbing off (dissolving) some of your trichs. I know you said you hold by the stem which is god, but it's important to remind beginners NOT to handle buds with oily fingers.
Thanks for the info.
 

OldMedUser

Well-Known Member
Just an FYI - don't forget the trichs are oil soluble. If you handle the buds with oily fingers you run the risk of rubbing off (dissolving) some of your trichs. I know you said you hold by the stem which is god, but it's important to remind beginners NOT to handle buds with oily fingers.
The tiny bit of coconut oil on my fingers soaks right in so my nimble digits aren't oily at all. After 4 hours of snipping there is almost no goo on my fingers so cleanup is dead easy. It seems to work like that barrier cream mechanics use to keep dirty grease and oil from soaking into the skin. You rub a bunch of that into your hands and it dries after a few minutes. As it's a water soluble cream the oil doesn't affect it so at the end of the day you first clean off the oily dirt with the regular hand cleaner for removing oil then wash your hands with soap and water and they are nice and clean. That barrier cream would probably work great for trimmers that don't like wearing gloves now that I think of it. I have some so will try it next time I crop some girls.

I plan to use coconut oil to clean and lubricate the blades on my new trimmer when I use it. Keeps my scissors from getting all sticky longer than the hemp oil I used to use.

:peace:
 

Bareback

Well-Known Member
Thanks, I've got some on the grocery list. And if it asorbes into the skin easy I will crush some aspirin in it and rub it on muscles and joints, but not spifts lol.
 

Bareback

Well-Known Member
Just an FYI - don't forget the trichs are oil soluble. If you handle the buds with oily fingers you run the risk of rubbing off (dissolving) some of your trichs. I know you said you hold by the stem which is god, but it's important to remind beginners NOT to handle buds with oily fingers.
I think I have some recipes with coconut oil as the thc oil, I will dig up the cooking with cannabis cook book and see.
 

BobCajun

Well-Known Member
Who has pics of a cure where the buds aren't green? Because green ain't exactly good. If it's green it ain't cured, it's just dried. This is what cured looks like.


This is what not cured looks like. Notice anything different?

 
Last edited:

Bareback

Well-Known Member
Who has pics of a cure where the buds aren't green? Because green ain't exactly good. If it's green it ain't cured, it's just dried. This is what cured looks like.


This is what not cured looks like. Notice anything different?

@BobCajun what method of curing do you use?
 

Roger A. Shrubber

Well-Known Member
Who has pics of a cure where the buds aren't green? Because green ain't exactly good. If it's green it ain't cured, it's just dried. This is what cured looks like.


This is what not cured looks like. Notice anything different?

they both look good to me. a lot of the end appearance depends on the strain, the pheno within that strain, the point you harvested it...a lot of people like to go when they see all milky, some like to wait till they see more amber/brown....if its bright green and smells like a cut lawn, thats bad, ^this....i'd smoke this
 

BobCajun

Well-Known Member
@BobCajun what method of curing do you use?
It requires mild heat. I use a Sunbeam heating pad. It's a model where you can turn off the auto off function that most of them have (they turn off in 2 hours). It's good for doing about 100 grams at a time. I put it in a plastic storage bin then put a layer of parchment paper over it and lay the freshly harvested buds on it, after trimming off all the leaves and leaf tips with no trichs on them. Then I put the lid on and turn the pad to lowest setting. Every few hours I open it and wipe off the condensed water from the lid and sides and rearrange the buds so they get to breathe a little and different buds are on the bottom where heat is greatest. The temperature should be 95-105 F for this part of the curing, 100 is ideal.

I watch for mold. Usually one or two buds will have a little bit somewhere by the middle of day 2. I spray the moldy part with water to wash it out and "whip" the bud to get the water off. You can deal with mold however you see fit, that's how I do it. Sometimes there's none at all, sometimes there's some. This is still a new thing I'm working on. Maybe a small thermoelectric dehumidifier could be used to prevent the condensation or a small fan might help. I just use the container and that's it. Not very refined but it works for now.

So anyway, after the first 48 hours I manicure the buds and put them back on the pad put another layer of parchment over the top and leave the lid off and turn the heat up full. The ideal temperature for this part is 125 F, which is what it comes to on full or just below full. The parchment is the normal paper kind, not silicone. The moisture needs to be able to pass through it, like a paper bag. You need the top layer to keep the heat in and to make the drying slow and even, again like the paper bag. The buds will continue curing and also slowly dry. I mix them around every few hours. I keep it in a pile a few inches thick, pushing the pile more to the center of the pad as it decreases in size due to drying. By the end of the third day it's dried and the process is complete.

Like I said, it's just a rudimentary system at this point. I'm sure others could improve on it if they put their mind to it. You could heat the container some other way than a heating pad for instance. The idea is to keep the buds alive for the first 2 day phase at 100 F. Obviously they're not as alive as when they were still growing but technically they aren't dead yet either. They gradually lose most of the green color and transform the starch into sugar, which gives a better flavor. In the end, it's considerably more potent than green bud and a whole lot less harsh. It also has a cured weed smell, meaning like imports. I think it decarbs the THCA to THC too from the prolonged heating. It's a much better product all around.

Some people will say this is bad way to cure but it works for me. I'm happy with the results. Three days and it's done, nice and quick. You could manicure the buds fresh and reduce the bulk that's in there, I just do that part later when they're somewhat drier and less sticky.

This whole thing is based on "flue curing" of tobacco. I just modified it a little. Normally they keep tobacco in the 125 F phase for about 5 days to ferment. To do that you would need to keep the container closed and humidity fairly high, about 80% RH. I don't want to give it that long because I'm worried about mold and also just want to get it done as quickly as possible. This quick method works well enough for me anyway. I just want to get it brown instead of green and give it a cured smell instead of a green smell, and also increase potency and improve flavor and mellowness.
 
Last edited:

BobCajun

Well-Known Member
Curing is literally having an rh of 55 to 65. Knowing the temperature is cool but if you dont know the relative humidity you cant know if its curing or not. I think you're method just drys them in a very humid environment.
That's the definition of curing to everybody in the Cannabis community but me. That's too dry. I forgot to mention that the first 48 hour 100 F phase requires a RH of 80-95%. So if a dehumidifier is used it would have to be hooked to RH relay set to that range. What everybody other than me does is to dry the buds first. That's only good if you want green buds. If you dry buds to 55-65% RH they'll be green forever, though they may lighten somewhat over several months. I just don't want green buds and I don't want to wait around for months. Green buds are harsh and taste crappy, plus are less potent.
 

BobCajun

Well-Known Member
isn't this something like making Malawi cobs?....but only something like....
The cob thing doesn't use heat. Now here's a couple pics of some in the final phase, almost dry. It doesn't go completely brown but much less green than normally "cured" weed. The container is 3' long. You could do the extended burping thing after this part if you wanted, might improve it further. As you can see, I clean my buds right down. No sticks in the middle like most commercial buds.


Last edited:
Top