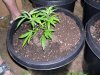
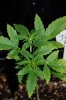
Its also very important to clean out all the lower shoots. They will not get enough light and they will take energy away from the top buds. The Fluff also sucks to trim. We have noticed that plants that are injured or stressed by bending and breaking produce much larger buds. WE go far past the old super cropping methods and really wound our plants so that when they repair they have much stronger stems and produce larger heavier buds.
These are all forms of LST.
Here is my Article on Bondage
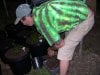
Words and Pics by Subcool
How do larger yields and bigger buds with only the cost of some string and some of your time? Would you like to fill the same amount of stash jars using less plants, taking less clones, then lets explore the science of
Plant canopy management
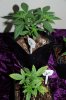
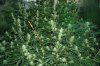
It is amazing what can be accomplished using plant bondage (LST) and canopy management. This can be very useful in medical gardens where the number of plants is limited but everyone can benefit using this technique by achieving larger yield per plant. I get amazing results with much larger plants using simple topping and spreading the plant open and using string or floral wire to tie her down. This method can help in many areas.
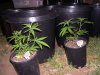
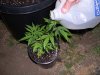
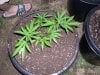
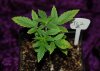
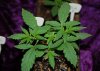
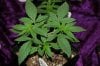
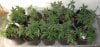
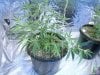
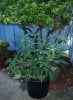
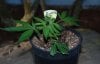
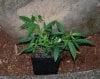
First we want to top our plants very early and close to the soil so they have multiple heads and there left in the vegetive phase for long enough to form a large bush with a height of about 24-36. Once the plants leave the vegetive area and enter the flowering room tie them down so that there over all height is much shorter and the plants are wider. This allows your lights to be a bit lower maximizing lumen efficiency. With taller grows some time the lights can be so high that the over all lumens reaching the shorter of the plants have diminished so much that those plants end up with poor yields. This method also allows you to fill a rather large area with far less plants and it requires fewer plants to be cloned.
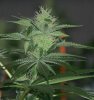
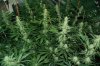
The second thing this training of the plant allows is more light to the second level buds or lower shelf as I like to call it. Before we employed this method or tops were huge but the lowers were airy and mainly fluff. This trick assures large buds even at the lower levels.
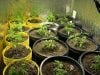
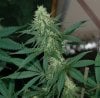
Last and most importantly it increases yields per plant, when the number of plants are limited thats extremely important. Many state medical programs have strict plant limits. So with larger topped plants tied up to maximize yields and manage the canopy height we get a good 4 ounces per plant minimum and on some strain we get 5 and 6 ounces per plant. Thats enough to last and make enough cookies for our patients and other friends who have cards.
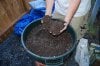
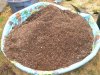
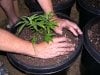
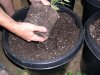
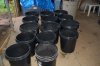
With my set up I run two grow rooms one for the vegetive phase ( Metal Halide) and one for budding phase ( High Pressure Sodium). I grow the plants in my own mix of concentrated super soil containing worm castings, bat guano, bone meal, Epson salts, lime, and other organic ingredients including endo/ecto mycorrihizae, which I find extremely beneficial to young plants. I start
rooted seedlings and
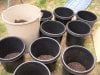
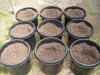
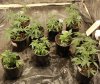
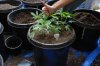
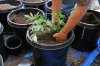
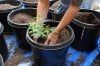
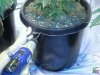
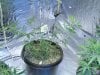
rooted clones in straight high quality potting soil so the super soil concentrate doesnt burn the fragile babies. The clones are started into rapid rooters and then they are transplanted into 1 gallon pots, and when there firmly established I top the meristem ( Main Stem) nice and low so that the plant develops a nice short bush shape with 3 to 4 growing heads, as long as I leave to sets of fan leaves the plant always recovers well and gets a great start.
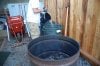
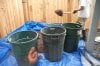
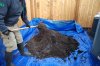
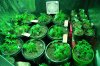
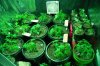
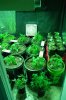
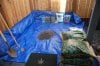
Seedlings are a bit different and you must allow the seedling to develop and have at least 4-5 internodes before topping. If you top a seedling to early the shock will slow the plant down tremendously wasting time. Clones and seedlings grow under a 18/6 light cycle until I can see roots in the lower drain holes. They then get transplanted again into large 7 gallon lowboy pots, using my super soil in bottom 2/3 of pot and straight premium potting soil in the top 1/3 and placed back in 18/6 under the same 1000 watt MH. Once the plants have been in veg for almost 60 days almost everything is finishing up in the bud room and harvest is approaching. One everything is trimmed up and the old pots moved out and the soil recycled its time to clean everything well, washing the floor and tarps with bleach and making sure everything is mold free. At this time I clean off the glass in the vented hoods with glass cleaner.
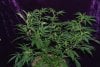
A clean room is the sign of a good grower! The plants are now placed in main bud room that measures 10x5 with 2- 1000 Watt HPS Hortilux bulbs.
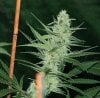
This is the time when we clean up our plants removing any smaller shoots that are shaded still so that this energy that would have gone to produce fluff and added time to trimming can instead go to the upper buds that are actually in the light. This also allows more air to circulate under the canopy so that O2 doesnt stratify. This in it self will increase the yields and make your trimming a bit easier. I am not sure everyone will get this analogy but the plant looking up should kinds look like broccoli with everything up top.
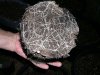
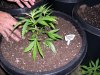
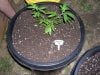
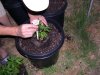
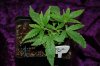
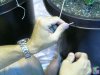
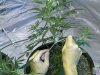
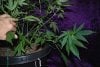
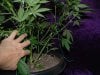
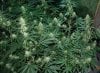
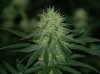
Using a small drill I make 4 holes directly beside each main branch. I use floral wire now and secure the branch about halfway up and then gently pull that branch down opening and exposing the center of the plant allowing more light to penetrate the canopy. As we have discussed this also makes the plant shorter and this can allow more veg time and a larger base stem all things that can increase your yields. Dont be so quick to bud your plants a few extra days can make a huge difference in how long your medicine holds out. Super Cropping is the next technique I want to cover here. In laymens terms super cropping is bending or pinching the stem causing slight damage, the plant repairs this damage making a stronger stem that for some reason creates much larger buds. Some people completely break there stems and then repair them using bandages or splits, we dont need no stinking bandages! Try treating a room of plants and not a garden, get in touch with each strain or hybrid you grow determining how much it will stretch and if it does best topped or like a rare few better untopped. Try some of these techniques on your plants and I know you will be amazed at the outcome.
 64.7 KB Views: 4,315
 66.7 KB Views: 4,018
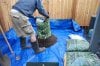 65.8 KB Views: 3,561
 67 KB Views: 3,619
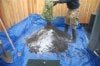 62.2 KB Views: 4,313