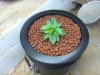
Ya. I tried something very similar. Now I just use plastic shot glasses to start seeds and the foam discs for cuttings.
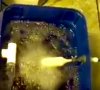
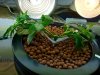
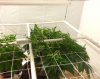
Clones take well in a 3 gallon or so plastic tote with small holes for the stem to fit through and a small water pump with a pvc rectangle and sprinkler fittings screwed into drilled holes.
FYI
My small pump for this just went out so I am using 2. 4watt air pumps to feed 4 air stones and still has cutting ls rooting and seed starts rooting out well. So maybe that is really all we all need??? I am not in the market for another water pump since this is working and seems to keep 2 water temps down since a pump isn't submerged in the bottom of the comtainer
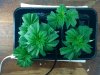