stardustsailor
Well-Known Member
W-O-W !!! I'll need a week or so to go through all that ...its for read...and take ideas...
https://github.com/FernandoGarcia -
Ferduino aquarium controller
Available in Portuguese, English, Spanish and French.
Easy to customize.FREE
1 x http://imall.iteadstudio.com/display...120419006.html
1 x http://imall.iteadstudio.com/prototy...120717001.html
1 x http://www.ebay.com/itm/Mega-2560-AT...item19d582a06b
2 x http://www.sureelectronics.net/goods.php?id=1020
1 x http://www.ebay.com/itm/New-16-Chann...item27c1368c78
more ideas...
http://code.google.com/p/jarduino-aquarium-controller/
jarduino-aquarium-controller
http://www.instructables.com/id/Creating-a-fully-automated-LED-growbox/
growbox
http://www.instructables.com/id/Backyard-Automated-Greenhouse/
Plantduino Greenhouse
http://gardenbot.org/about/
GardenBot
http://arduinogrc.blogspot.com.es/
Arduino Grow Room Controller
more ideas... on the typhon way...
http://shop.stevesleds.com/Typhon-Typhoon-LED-Controller-Typhon.htm
http://code.google.com/p/typhon-reef/
http://code.google.com/p/typhon-reef/source/browse/#svn/trunk/hardware/typhon
hardware
http://code.google.com/p/typhon-reef/source/browse/#svn/trunk/software
software
The code is for the basic version.
Steve's LEDs latest code is not publicly released.
We are able to provide you with the hex code, should you need to restore your Typhon to factory default firmware.
http://www.stevesleds.com/uploads/Typhon_LED_Controller_4114.pdf
...curious fan way......
http://shop.stevesleds.com/Pressurizing-Cooling-Fan-with-Power-Regulator-Pressurizing-Cooling-Fan-w-plug.htm
http://imall.iteadstudio.com/im130529001.html
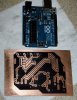
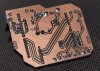
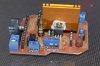
[Bare PCB] Typhon Board
http://coralux.net/?wpsc-product=storm-led-controller-2
storm-led-controller
http://coralux.net/?wpsc-product=storm-x-led-controller
storm-x-led-controller
http://www.boostled.com/product_p/typhon.htm
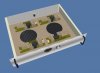
Typhon LED Controller
http://cdn.shopify.com/s/files/1/0055/9572/files/TyphonControllerManual.pdf
Typhon LED Controller Kit Manual
http://coralux.net/?p=213
development of a 0-10V PWM controller
http://www.nano-reef.com/topic/321511-typhon-based-led-controller-on-the-cheap-seriously/
Typhon-based LED controller on the cheap (seriously)
http://www.plantedtank.net/forums/showthread.php?t=603658
2surplus's 6' New LED Build.
http://www.plantedtank.net/forums/showthread.php?t=183131
Calling all DIY LED "Junkies" - Your opinions wanted!
http://www.reefcentral.com/forums/showthread.php?t=2310459&page=2
Has anyone made an LED driver based on LM3463 6 channel driver IC?
http://www.plantedtank.net/forums/showthread.php?t=136148
DIY PCB's for DIY LED Systems.
http://www.plantedtank.net/forums/showthread.php?t=139167
Just built a DIY LED Controller
http://www.plantedtank.net/forums/showthread.php?t=152852
built another DIY led driver!
http://www.plantedtank.net/forums/showthread.php?t=120109
DIY PAR meter, Yeah you heard me
http://www.reefcentral.com/forums/showthread.php?t=1759758
DIY LED driver for reef lighting
http://www.plantedtank.net/forums/showthread.php?t=519649
DIY "Knob Dimmer" for PWM based LED drivers.
http://www.plantedtank.net/forums/showthread.php?t=243562
A Cheap, Simple, Compact DIY LED Controller/Driver COMBO.
http://www.reefcentral.com/forums/showthread.php?t=2222702
Meanwell LDD driver: for those who want to dim to 0 using Arduino
pardon if i hijack this thread its for your reads sds... i hope you understand me a litle bit...

But I really have to thank you very much for taking the time ,
to post all these idea-sources ...
Wow! ...