Cheapo DIY Chinese LED grow. 200w

Gastanker

Well-Known Member
I've been posting this in my other thread so here's a quick catch up.

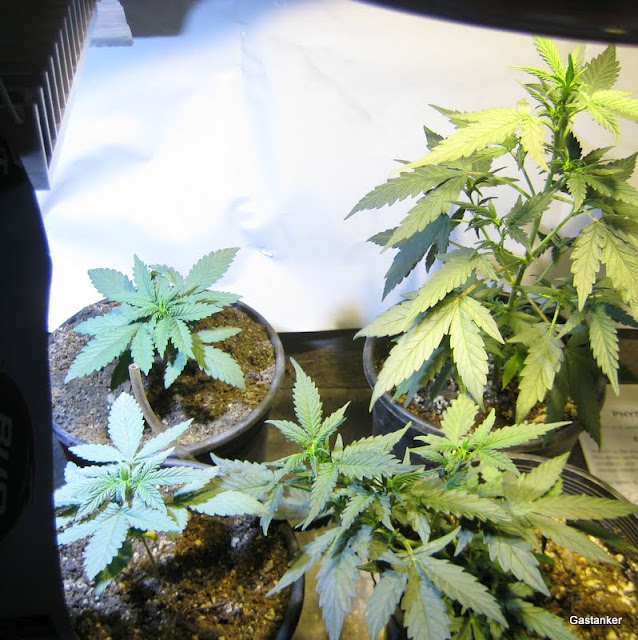
These are 100w arrays (1wx100) ordered from ebay direct from China. 100w LED drivers from the same company. Heatsyncs from heatsync USA. According to my multimeter the cool white is pulling 87w at the array and the warm white is pulling 96w at the array. Everything combined cost me <$180.


Start with plants and modifications:


Two days ago when I added the second light and flipped to 12/12 - this will be a perpetual micro-grow:
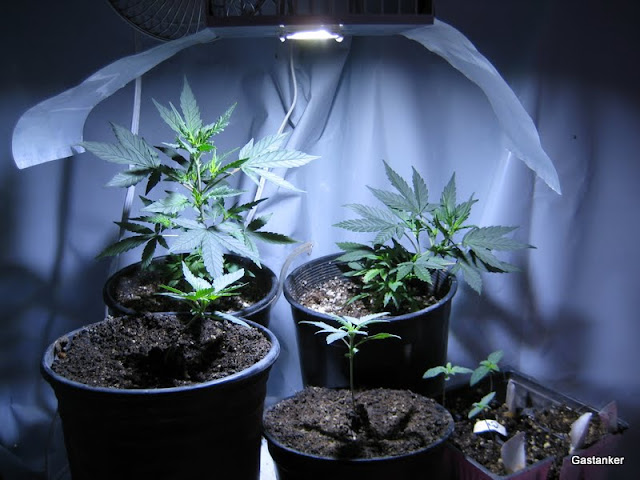
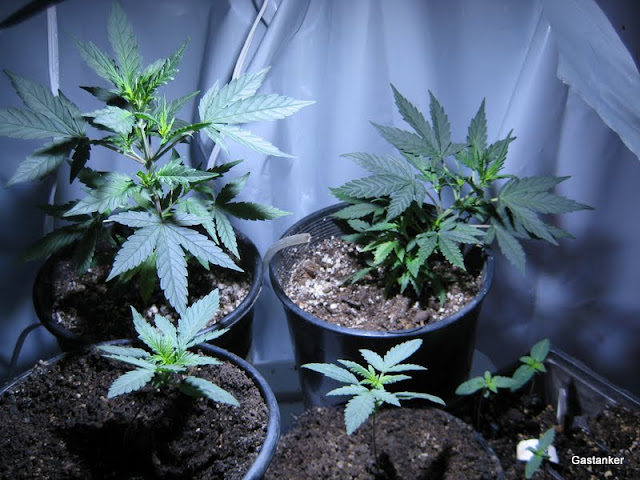


Progression:
Day: 1,4,7


9/2
 

Rcb

Well-Known Member
fuck yeah. Gastanker your the shit. This little micro grow looks awesome are you going to order anymore LEDs?

I watch a lot of your journals.

:)
 

Gastanker

Well-Known Member
fuck yeah. Gastanker your the shit. This little micro grow looks awesome are you going to order anymore LEDs?

I watch a lot of your journals.

:)
Glad to have you around. Not sure about ordering more just yet although I would love some 50watters to spotlight my aquariums... This is just an experiment so I went cheap and I'm staying small till I get a bearing on the whole LED thing.

Nice work! Do you have thermal paste under those LED's?
Of course, even sprung for the expensive 99% silver stuff. With a fan the heatsyncs are just warm to the touch but without moving air they get very hot. Can't imagine how long one of those arrays would last without thermal paste and a decent sync.
 

Rasser

Active Member
Glad to have you around. Not sure about ordering more just yet although I would love some 50watters to spotlight my aquariums... This is just an experiment so I went cheap and I'm staying small till I get a bearing on the whole LED thing.

Of course, even sprung for the expensive 99% silver stuff. With a fan the heatsyncs are just warm to the touch but without moving air they get very hot. Can't imagine how long one of those arrays would last without thermal paste and a decent sync.
Invigorating seeing those chips and driver on the first image laying there waiting
Great work on the light, and that one with the round reflector looks very potent, how big is that fan anyway ?
 

Gastanker

Well-Known Member
Invigorating seeing those chips and driver on the first image laying they waiting
Great work on the light, and that one with the round reflector looks very potent, how big is that fan anyway ?
The fan sitting on top of it? hehe, it's a fairly large one. 4.5'x4.5' I believe. Was pretty much the only 120v I could find but it pushes a ton of air and is built to last so I'm happy with it. If I ever do this again I'm going with one long heatsync and a single large fan like that in the center - it blows air down the length of the fins like crazy.
 

Gastanker

Well-Known Member
The two clones (larger ones) were rooted under mild sunlight and then put under LEDs at the size shown on day 1. The rest have been only under LEDs.
 

Amaximus

Well-Known Member
Hey, How did I miss this thread? Great little setup you got going Gas. The girls seem to be loving it.

Also, I didn't miss a thread or anything where you actually built these leds, did I?
 

PetFlora

Well-Known Member
After reading SXs comments regarding Cree whites on another site I have been very curious to see how well a white only set up works.

Any particular reason for not using say 4 X 25 watters and spreading them apart?
 

Gastanker

Well-Known Member
Thanks, helps me vision the progress under the LEDs
No problem. I added another picture to the timeline so that people can see how they looked after I added the second light.

Hey, How did I miss this thread? Great little setup you got going Gas. The girls seem to be loving it.

Also, I didn't miss a thread or anything where you actually built these leds, did I?
Well there might be just a tad bit of info in my 600w UV tent thread but not really. Putting them together was pretty simple - I drilled the heatsync, applied thermal paste, and then screwed down the arrays. After that all I had to do was some simple soldering. If you have questions on the build feel free to ask.

After reading SXs comments regarding Cree whites on another site I have been very curious to see how well a white only set up works.

Any particular reason for not using say 4 X 25 watters and spreading them apart?
Cost. This whole project is just an experiment as I personally am not completely sold on LEDs so far. I was aiming for maximum wattage/$ over actual efficiency - which I realize for LEDs is a bit silly but all the same I like to experiment on the cheap side. 200w via 2x100w arrays is less expensive than 200 via 8x25w arrays.

They do seem to be working and if I have half decent results I might put together another panel in which case I would likely go with smaller arrays supplemented by a few colored 3watters all mounted to a nice long single heatsync. I originally had wanted to go with smaller white CREEs but ended up at ~$750 for 200 actual watts compared to my $180 for the same wattage - just couldn't justify it to myself. In my mind the difference of $570 is better spent by just running more wattage - in fact I could run an additional 200w of cheapo LED 24hrs/day for 989 days and it would still be less expensive than going with half the wattage in CREEs.
 

Amaximus

Well-Known Member
Well there might be just a tad bit of info in my 600w UV tent thread but not really. Putting them together was pretty simple - I drilled the heatsync, applied thermal paste, and then screwed down the arrays. After that all I had to do was some simple soldering. If you have questions on the build feel free to ask.
I was mainly curious about how easy it was to assemble once you had the parts and what your parts list consisted of, bought or otherwise already had, Also what tools other than the solder gun were needed. (Anything out of the ordinary anyway)

I may not understand 75% of the more in depth LED conversations that happen in this forum but I am mechanically inclined and have a solder gun and wouldn't mind tinkering with my own DIY panel if I could get a little more understanding and what was required.

Thanks for any input, Gas.
 

Gastanker

Well-Known Member
I was mainly curious about how easy it was to assemble once you had the parts and what your parts list consisted of, bought or otherwise already had, Also what tools other than the solder gun were needed. (Anything out of the ordinary anyway)

I may not understand 75% of the more in depth LED conversations that happen in this forum but I am mechanically inclined and have a solder gun and wouldn't mind tinkering with my own DIY panel if I could get a little more understanding and what was required.

Thanks for any input, Gas.
It was really easy. I would say the most difficult part is determining which side rail is the positive and which is the negative.

Here's a list of everything I purchased:
1x 100w cool white array - http://www.ebay.com/itm/300639533243?ssPageName=STRK:MEWNX:IT&_trksid=p3984.m1439.l2649
1x 100w warm white array - http://www.ebay.com/itm/330660077325?ssPageName=STRK:MEWNX:IT&_trksid=p3984.m1439.l2649
2x 100w constant current drivers - http://www.ebay.com/itm/330660091340?ssPageName=STRK:MEWNX:IT&_trksid=p3984.m1439.l2649
2x 5.88" x 6" heat syncs - If I were to do it again I would go with slightly larger. And keep in mind that heatsyncs vary tremendously, for instance these are ~3x the weight of other similar sized syncs - http://www.heatsinkusa.com/5-886/
1x Artic Silver 5 99% silver thermal compound - http://www.radioshack.com/product/index.jsp?productId=2216879
4" fan
2x $0.89 extension cords

Tools I used and other small stuff I had on hand:
Solder gun and solder
Screw driver and screws
Drill and drill bits
Electrical heat shrink, electrical tape, or wire nuts.

I'm pretty sure that covers everything. I added a reflector I had laying around and cut up some 24oz aluminum cans for reflectors but I wouldn't say that's necessary :)
 

Amaximus

Well-Known Member
It was really easy. I would say the most difficult part is determining which side rail is the positive and which is the negative.

Here's a list of everything I purchased:
1x 100w cool white array - http://www.ebay.com/itm/300639533243?ssPageName=STRK:MEWNX:IT&_trksid=p3984.m1439.l2649
1x 100w warm white array - http://www.ebay.com/itm/330660077325?ssPageName=STRK:MEWNX:IT&_trksid=p3984.m1439.l2649
2x 100w constant current drivers - http://www.ebay.com/itm/330660091340?ssPageName=STRK:MEWNX:IT&_trksid=p3984.m1439.l2649
2x 5.88" x 6" heat syncs - If I were to do it again I would go with slightly larger. And keep in mind that heatsyncs vary tremendously, for instance these are ~3x the weight of other similar sized syncs - http://www.heatsinkusa.com/5-886/
1x Artic Silver 5 99% silver thermal compound - http://www.radioshack.com/product/index.jsp?productId=2216879
4" fan
2x $0.89 extension cords

Tools I used and other small stuff I had on hand:
Solder gun and solder
Screw driver and screws
Drill and drill bits
Electrical heat shrink, electrical tape, or wire nuts.

I'm pretty sure that covers everything. I added a reflector I had laying around and cut up some 24oz aluminum cans for reflectors but I wouldn't say that's necessary :)
Absolutely fantastic post. Thanks for such a detailed list Gas, It is highly appreciated. + rep

Later today/tonight I'm gonna take an in depth look at the components and I may have a few more questions for you.
It looks as if I need the array(s), driver(s) & heat sink(s) and that is all. I have everything else on hand. So I may have found myself a little project.

Oh, Do you have any type of diagram or a link to one that shows the actual hook-up and what goes where? I'm not sure if that is a basic question or not, I'll be sure to look that up as well if I don't hear from ya. Again, Thanks!
 

Rasser

Active Member
Can I put this in my signature: lol
"in fact I could run an additional 200w of cheapo LED 24hrs/day for 989 days and it would still be less expensive than going with half the wattage in CREEs."

Thank you very much also for the part list, with links !

Did you mount the chips with nuts and bolts or did you make threads ?
( I see one screw line up with a fin, but I'm not sure)

And have you found a name for your two lights, or shall I just refer to them as Gastankers Liberty Bell 2700 and his Grapple 6000 ;-)
 

Gastanker

Well-Known Member
Not sure why but you solder to the rails on the sides versus the more apparent positive negative contacts. The rails are identified by comparing which side they favor. So the negative will be connected slightly more closely to the negative end (labeled)... The ballasts themselves are labeled so they aren't much of an issue.


Let me know if you need anything else clarified.
 
Top