DIY Grow Chamber - NO SHIT - CHEAP AWESOME AND SAFE, but you be the judge! - DAY 1

legalizeitcanada

Well-Known Member
K, so whats up everyone, been on this site a bit now and asked tons of questions, got great feedback and answers and now it's my time to give back, just my way of saying thank you for all the knowledge and support from the rollitup community!......

I've been searching for a cheap grow setup and man there aint one out there, after you get all the peices, shipping, duty and what ever else big corps can get outa you, WTF, it aint worth it. Well...i like to think of myself as an intelligent person so I smoked a nice fatty and came up with this gem!

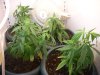
I'm sure its been done before but I couldn't find much about it on the net, so.....ima gunna do it........I'm gunna show you one of the cheapest and safest way to grow bud by building a grow chamber out of an fridge. We will end up with a Chamber for Clones, one for Mothers and another for flowering plants all in one enclosed unit! Can you say inexpensive it's a fridge that I got for free on Kijiji.ca.

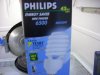
At the end I'll give a total rundown of parts, cost and total power consumption, in relation to the fridge running. For this one I'm gunna use CFL's, but the next one will be HPS/MS. I'm gunna post pics as I got through the process and try to explain everything as best I can, just finished day one! IF you have any questions feel free to ask, and I aint no electrician so if you see me fuckin somethin up let me know please! I think this is better than any grow tent, and way cheaper!!!

Hope you all dig it!

so.... here we go, pics posted below each section

DAY 1

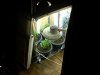
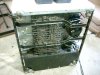
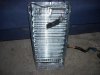
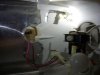
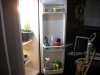
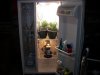
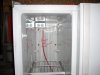
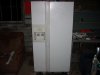
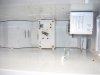
1 get yourself a free fridge off of Kijiji.ca , I would go for a double door side by side, some have a triple door and if you can score one that would be even better.

3door fridge2.jpeg
3doorfridge.jpeg

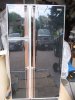
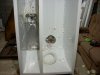
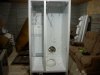
This is the one I got!
DSCN2765.jpg

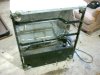
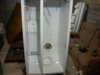
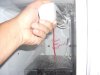
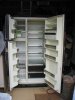
2 get the fridge home and clean the shit outa it

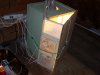
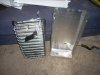
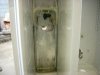
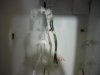
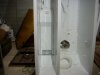
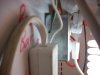
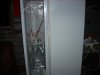
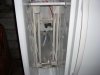
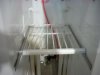
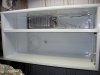
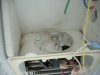
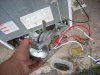
3 NOw the nitty gritties, remove all the shelving from the fridge, we are gunna start taken er apart, start with all the shelving brackets, remove the ice maker and motor,
DSCN2766.jpg

should look something like this
DSCN2767.jpg DSCN2769.jpg DSCN2774.jpg DSCN2768.jpg


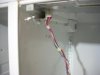
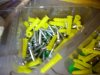
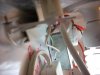
4 when cutting wire be sure not to cut you main leads which run the lights in your fridge, wiring is aready run to the each area so they already did the job for you
DSCN2770.jpg DSCN2771.jpg

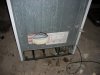
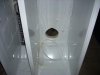
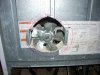
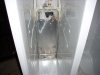
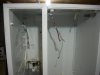
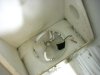
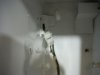
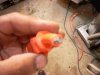
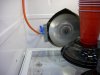
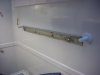
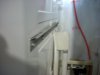
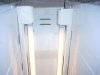
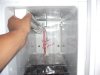
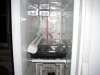
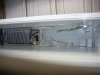
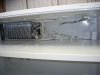
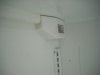
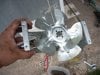
5 OH snap.....what's this.....a nice little free present.......if you look.....you will see that in the freezer there is a fan already in place, this will be used as your intake fan...sweet
DSCN2775.jpg

also there are venting ducts, the duct work that you took off "SAVE" so this can go back on to push air throughout the entire fridge!
DSCN2776.jpg DSCN2777.jpg

(ill post pics of this when its back together too)

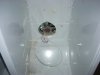
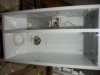
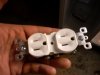
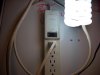
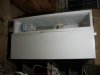
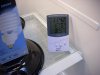
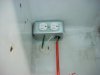
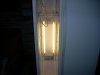
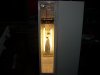
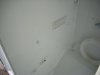
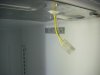
6 remove the controls for the themostat from the fridge part and leave the wiring for the lights. (you may have to install a jumper here to get power to this side of the fridge)

forgot to take pics of this part, was pretty stoned, but if you look at this pics you will see it at the top of the fridge part
DSCN2765.jpg

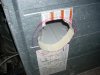
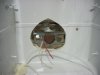
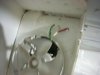
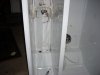
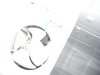
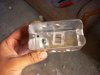
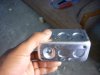
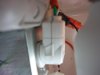
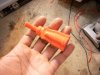
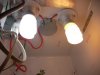
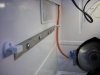
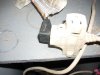
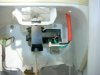
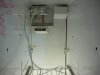
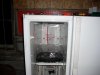
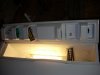
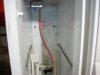
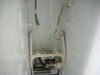
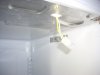
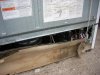
7 now the fridge manufactures have another surprise for you...look closely...do you see it?
DSCN2780.jpg

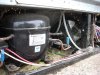
Fuckin Sweet man! another fan, and a biggie, this will be used for your exhaust fan!
DSCN2781.jpg DSCN2779.jpg

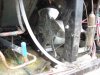
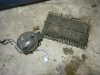
Grab that bad boy outa there and clean him off! Make sure to leave enough lead wire to attach to and don't cut your main power as it is located near here!
DSCN2782.jpg DSCN2783.jpg

That was pretty much the end of day one, clean it, rape your pieces from it and take off all the hardware. This took me about 2 1/2 hours to do!

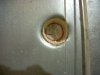
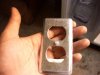
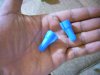
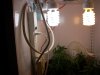
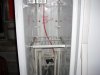
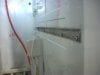
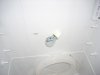
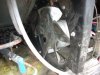
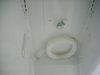
NOTE** See the tubin here, i'm sure this can be made into a hydroponic system, the next thing I'll tackle, using soil this time though.
DSCN2773.jpg

Also, some of you may want to keep the compressor fan if you feel like using the fridges cooling system to regulate your temperature or cool your exhaust, once again something im gunna tackle in the future, this is the first one and i'm just doin a basic build.

DAY 2 Comin SOON!!
 

Attachments

dyzel

Well-Known Member
Looks really great so far! Good luck with the rest of it! I'll be tagging along on this one!
 

legalizeitcanada

Well-Known Member
Well right now I'm kinda budget constrained, so I'll be using CFL, the 23 watt flourescents, There will be 4 on the top and two on the sides, Im also installing two uv lights for the flowering plants, on the other side I got 4 more cfls running for the mothers and 2 more small ones for the clones. DAY 2 will be setting up the exhaust system and installing the lights, i'll give the rundown, so far though its workin great!!

I'll be goin for a HPS MH and hydroponic setup next time though!

Right now the girls are in a cruddy little box i made so i gotta move on this, their doin sweet though. When i first got the clones they were sick as fuck, so i have been nursing them back to health, i didn't have a space ready for em, so this was the quick throw together!!

DSCN2741.jpgDSCN2745.jpgDSCN2740.jpgDSCN2744.jpgDSCN2764.jpgDSCN2759.jpg
 

Adosbulc

Well-Known Member
just subscribed, i was thinking of doing the same thing but leaving a couple of the racks in and doing a scrog

keep this updated! let me know how the fans work out ;)
 

legalizeitcanada

Well-Known Member
I'm planning on the same thing just hadn't got there yet, will do! , best thing is you can move the racks and leave the light stationary!!
 

legalizeitcanada

Well-Known Member
Ok so..day two....here's what I did

I started with a bit more gutting, taking out the compressor and both rads, this reduced the weight alot and it was much easier to work with,
DSCN2723.jpg

afterwards it should look something like this
DSCN2724.jpg DSCN2727.jpg

This is what was removed
DSCN2725.jpg

Then I took the rad or whatever its called, outa the freezer, make sure you keep the casing and don't bend it, your gunna need it later
DSCN2732.jpg DSCN2733.jpg

Next was holes and fan installation, here is the first hole, cut a pilot and then used a jig saw to make the hole bigger!
DSCN2726.jpg DSCN2728.jpg

This fan rocks it's 7.5", fits like a glove, don't mind my stoner cutting, this area is gunna get a cover as you'll soon see, hopefully on day three, also you can see i had to notch out an area to get it to sit in tightly
DSCN2735.jpg DSCN2729.jpg DSCN2730.jpg DSCN2754.jpg

here is the intake hole, this was the size of the pilot I cut, I used a doorknob cutter to do this job, the red line you see is on the back of the rad guard, I installed it after cutting the hole and marked it with a sharpie, then took it out again and cut the hole in it, its really soft metal so be careful!
DSCN2737.jpg DSCN2739.jpg

this is perfect cause the intake is smaller than the exhaust, if my recollection high school science is correct from way back when, then this should ensure suction through the fridge

Next I drilled hole and passed the wiring through for the intake fan in the freezer part
DSCN2749.jpg

I re-installed the rad guard, this is what your gunna need to re-attatch the cover
DSCN2738.jpg DSCN2734.jpg DSCN2741.jpg

Use these wires for your main power in the freezer, one simple plug is gunna run this whole thing!!! The wiring seems like it may be pretty easy! Fucken Eh! I will explain what i did once its done
DSCN2745.jpg
im going to put a plug outlet that the power bar will just plug into, additionally a timer can be put here two

on the fridge side this is your power
DSCN2743.jpg DSCN2742.jpg

the same rule applies a junction box at the top for the lights to get connected in and a power receptacle on the side, I should have these items installed in the next few days

Then I put the cover back on in the freezer part, Here what she looks like so far!
DSCN2752.jpg

K I think thats it for day 2 again this took like two hours to do, so...so far I've only put like four hours into this thing and i think im about 1/3 of the way there!!!!! sweet! Should see updates every day or two until completion, budget permitting LOL, friggen money, grow babies grow
:mrgreen:
 

Attachments

legalizeitcanada

Well-Known Member
Fuken Eh! Day 3!!

So i kinda ran outa cash but Im 90% done the grow chamber, all the electrical components cost me about $30buck, the total spend for this grow room now is $70, the other $40 was for the two big CFL's. I'll give a rundown of everything I bought at the bottom

So what did I do today...

I went shopping an got myself some stuff,
1 Junction Box
DSCN2729.jpg

2 Universal Device Casing
DSCN2748.jpg
DSCN2749.jpg

(make sure the back is flat on both of these to be able to mount them properly)


1 Receptacle Cover

DSCN2751.jpg


2 three prong receptacles
DSCN2750.jpg


1 three prong plug attachment
DSCN2762.jpg
1 back of wire straps
DSCN2761.jpg
1 bag of 20 merrits
DSCN2747.jpg
2 43 Watt Fluorescent Bulbs one cool one hot
DSCN2757.jpg
(I will be adding 5 more)


1 three prong extension cord
DSCN2755.jpgDSCN2752.jpg
your gunna cut this up for your wiring!!!!

1 box of 100 screws with butterflys
DSCN2759.jpg

So the first thing I did was clean up the wires, I cut all the wires except WHITE BLACK and GREEN with yellow stripe, This is your HOT, GROUND and NEUTRAL, cut all the other wires off

leave yourself power on the freezer side and on the fridge side!
DSCN2735.jpg
The Extension cord is great cause it's really cheap, dollar store, I only got a 12' one, the cool thing is that it's really insulated and its three phase just like the fridge, so all you gotta do is match colors!! SWEET! Measure your length to the lights and cut, remember to leave extra for leads and to run into the boxes!!

I marked the fridge as you can see where I wanted to put things, then I marked the screw holes for the boxes, pre-drilled, tapped in the butterflys and mounted the casings.
DSCN2730.jpg
Next I cut the x-cord to the lengths I needed and striped the ends, I fed the wires into their respective slots and merrited them together
DSCN2767.jpgDSCN2736.jpg
Then I installed the light sockets.
DSCN2739.jpg
Next I mounted the power bars
DSCN2731.jpg
I also mounted some support for when the plants get bigger,
DSCN2737.jpgDSCN2738.jpg

I'm gunna do a scrog, the fridge comes with shelving where the glass just comes out, chick wire can easily be attached to this and hung from the original shelving brackets, FREAKIN PERFECT,,haven't done this yet so no pic, but will post it on Day 4 the Last day!!

As you can see there are only two lights, I'm installing another two on the top for a total of four. I'm also adding another three on the three sides of the fridge, another two UV lights are gunna be placed close to the top also (will post pics when this is done)
DSCN2733.jpg


Because I havent finished my mother and clone section, the newbies are located here for now. This fridge thing is friggen sweet, really versatile!!
DSCN2734.jpg


So I have four plants placed in here, the pots are round so the sit kinda awkward but I'ma gunna get me some square ones and it'll be beaut!
DSCN2740.jpg


I think the ladies love their new home

and check it, you can store all your nutes and stuff right in the door, you water and fert will always be the same temp as your plant roots, no worries of shockin the plant unwantedly!
DSCN2741.jpg
There is like no light leakage out the door, the little bit of light you see is from the vent between the chambers and there is a light trap that the fridge manufactures have provided for you that needs to be re-installed, will show this when i finish this side.
DSCN2743.jpgDSCN2744.jpgDSCN2742.jpg
There is a small amount of light coming out the fan hole in the fridge part, but I haven't installed any exhaust tubing yet, when i do that will take care of that leakage!


So here is what is looks like almost done!!

DSCN2728.jpg


I have put the plants in late this is what the temp and humidity was, today an noon it was sitting around 24 Degrees and humidity of 44%, ideal I think
DSCN2758.jpg


And all this on ONE POWER CABLE !!


DSCN2764.jpg


THE NEWBIES!!

DSCN2723.jpgDSCN2726.jpg


So on day four I will have the mothering and clone chamber finished, day five the project will be fully complete, Day three I spent about 4 hours working on this thing, so far it's a total of 8 hours, but i have to admit much of that time was spent smokin dubes or standing and thinking, with directions, im sure it can be done much quicker!


Hope you all are diggin this !!:weed::leaf:
 

ImTheFireMan

Well-Known Member
it looks like the exhaust it at the bottom?

whats the temp in there after the doors been closed a while?

looks good.

so does this thing just sit in your garage super stealth like?
 

legalizeitcanada

Well-Known Member
Delove -Thanx bro, greatly appreciated

imthefireman - Ya dude the exhaust is at the bottom, stole it off the compressor for the fridge. Havn't attached any hosing yet but I will be soon. The temp sits right between 24 - 27. Even when its really hot outside it stays a bit cooler in there. And ya its just sittin in the garage, looks like a beer fridge, until you open it LOL!!
 

barefoot and stoned

Well-Known Member
+rep man! I was just talking to a buddy the other day about how we could do this exact thing! I should be able to do it no problem with this as a guide! Can't wait to see how it turns out.
 

legalizeitcanada

Well-Known Member
So for all you following, I pretty much finished up the mother and clone section. I'm still missing a few lights but I finished enough so that you can follow along and finish yours if your doin one!

Once again leave me a post, i dig readin em, if you appreciated this thread, rate if for me or subscribe! Im into this site and wanna build up my prof. too! THANKS ALL

SO LAST POST ON THIS THING as for instruction!!!
one more post for total cost and power rundown and just extra ideas of things you can do!!

ONE LOVE YALL!~

HEEER WE GO.........:leaf:

So first I wired up the outlet on the freezer side, as you can see I ganged the fan into the outlet, in my grow fans run 247
DSCN2734.jpg

DSCN2731.jpg

This area needs to be soldered
DSCN2730.jpg


Then i built some support brackets for the clone area
one left
DSCN2725.jpg
one right
DSCN2726.jpg
I just used framing from an old screen door, so it didn't cost me nothing, but you can get cheap metal trim from home deepot for relatively cheap and just drill some holes in it

Next I installed the lighting for the mother area, I only had two so I placed them at the back, there are two more going in here
DSCN2736.jpgDSCN2727.jpg

Next I installed the backing plate
DSCN2744.jpgDSCN2743.jpg

and the ducting for the fan and the light trap
DSCN2746.jpg

Then I took the little shelve that cam with the fridge and placed that in for the clones area
DSCN2735.jpgDSCN2733.jpgDSCN2737.jpg

There are two lights goin in at the top here
DSCN2739.jpgDSCN2740.jpgDSCN2738.jpg

I am putting them on chains so I haven't installed them yet as i havent go't the chains

So here is what this side looked like completed
DSCN2742.jpg

Oh ya and more storage!
DSCN2750.jpg

And so now you have a controlled unit with full exhaust, lighting and isolation, that is super stealth and can be put almost anywhere. You can put a lock on it. Friggen Awesome!
DSCN2749.jpg
 

Attachments

Adosbulc

Well-Known Member
awesome man
ill be doing something extremely similar in the near future; im in the construction industry and I like doing stuff like that, I was planning to do it in a wardrobe closet but a free fridge seems better ;) I think I would be scrogging 6 plants, 2 each on separate shelves so I can harvest once a month.

and I dont know too much about wiring, would it be safe to hook up 8, 26 watt cfls to a junction box then connect it to the fridge main power supply? it would be nice to only have one plug
I was thinking of mounting 2 power bars on brackets that I could raise/lower, each with 2 double light bulb splitters. I would be plugging that into a 2 socket timer


only thing I would advise is to put some sort of screen infront of that fan.. wouldnt to accidentally put your hand or anything else in there
 

legalizeitcanada

Well-Known Member
Thanks man, Ya most fridges pull between 400 and 800 watts of power when on, with the compressor and all, its a pig, then all the lighting sockets in my fridge are rated at 40 watts , so... as long as you keep it under round 500 to 600 watts of lighting and extras, you should be good, the little fans don't take much power to run to. The CFL's im using are 43 watts I will have 7 of em in the flowering chamber, plus another four 3 foot tube florescent for the mother and then two more 1.5 foot florescent for the clones, and two fans, I have all these wires powered by the one fridge plug and it seems to be working great, just make sure to ground you device boxes and all devices (with the green and Yellow neutral)( you usually see green screws where this goes on the device boxes and devices)!

The two double socket light bulb splitter would work pretty good, taking into account that you have sufficient lighting, but may be more trouble and money than its worth, I got my light sockets for $1.29, so all 7 for about 10 bucks, the lights are stationary but the shelves more, plus, you can adjust your screen for SCROG or lower the plants down, I'll post a demo one I get that setup. I would step up to the 43 watters, and make sure you check the bulb color and have the right ones for the flower and bloom stage, you'll need to change em! The run about 12 - 15 buck ea.

As for the fan man, I agree, I'm actually using some ducting that are 8" to 6" reducers placing those on, running some hose to the top og the flowering chamber to suck the heat out and placing some hose in the back for the air to travel through and cool down before goin outside, it's in my garage which isn't heated and so it'll come out the same temp as outside! This will also eliminate any light leakage from the hole.

The only problem (and not really a problem just a drawback, IMHO) with two levels is you need double lighting and your plants will be real small, if you do it right you could scrog eight plants and get em about 3' high in total, with at least 12" on the top of bud, once again when I start buddin, I'll crack a pick and bust it up, but give it a try, experimentation is the only way to learn, I could be wrong, it may very well work great for ya! keep me posted, im interested to see how it turn out for ya, if you have any questions feel free to drop me a line, Ill help ya any way I can, best luck and keep tokin!!! oh ya if ya don't mind pop a rating on this for me!
 

legalizeitcanada

Well-Known Member
woo hoo, got a five start for this thread!! Thanks. Hope it helps nebody wantin to try this out,, peace love and trichomes!!


Also i noticed after using this thing for a few days now that is does tend to get kind hot even though its just CFL's so.......you may have to stick in a small fan at the top to help remove some heat or run some tubing from the vent on the bottom.....all in all though its workin awesome!!!
 
Top