Wolfman Zen
Well-Known Member
Going through some rough times, and not wanting to pay some one else for my medicine, I decided to grow my own. Something I should have done a long time ago. I will admit, it was just easer to buy what you needed when you needed. However the local supply is less then desirable  .
.
So it begins...
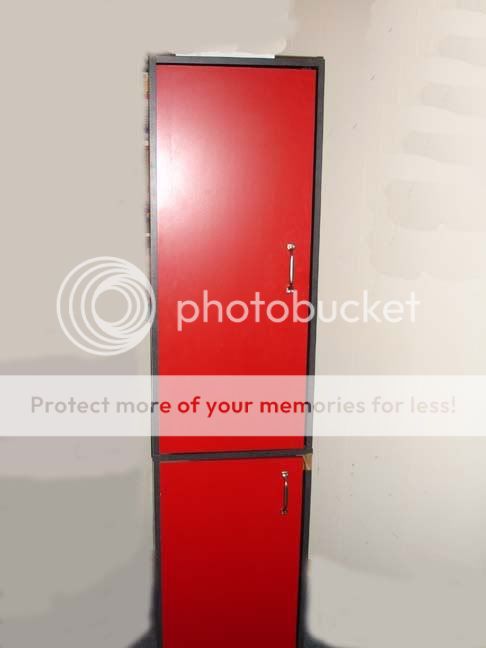
First thing is deciding what kind of grow... I don't need much so a micro cab grow would be perfect for me... looking around the house I picked this locker cab as the base of my grow.
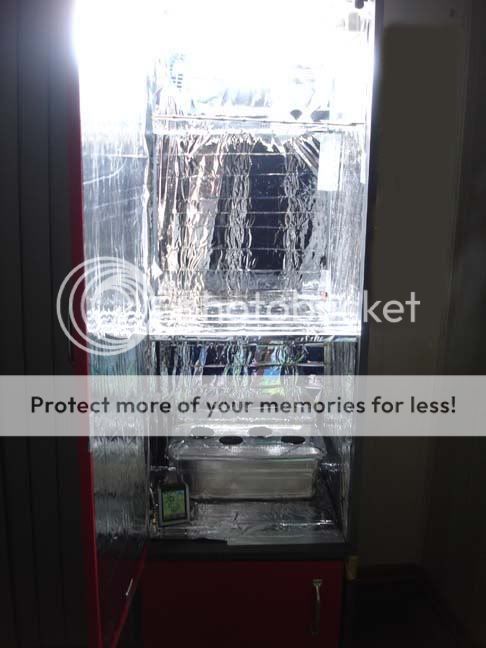
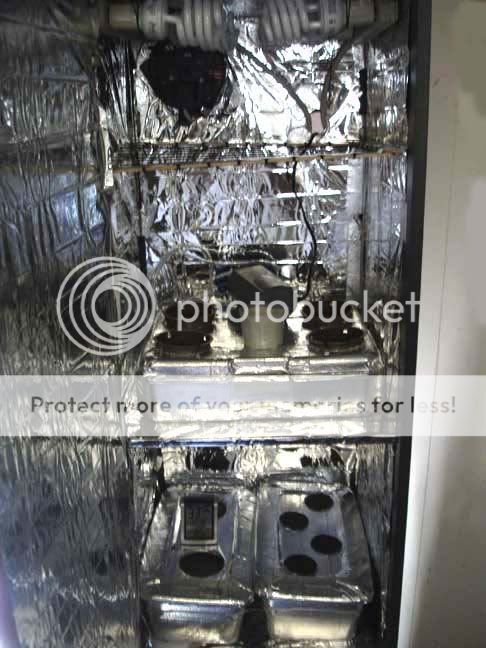
I'll start with the top half, which has is separated into 2 chambers by a removable and hight adjustable shelf. I plan to use the top chamber for budding and the lower chamber for a clone mother and clones. I will work on the lower half later as my grow gets going.

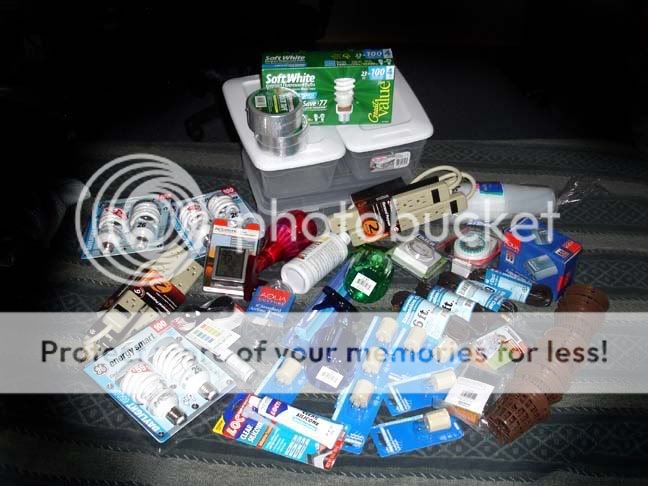
I'm going for stealth, small scale and ease of use not to mention low cost. A trip to the city and about a $100 later I'm ready to get creative.
Used mylar emergency blankets to coat the inside for maximum reflection.

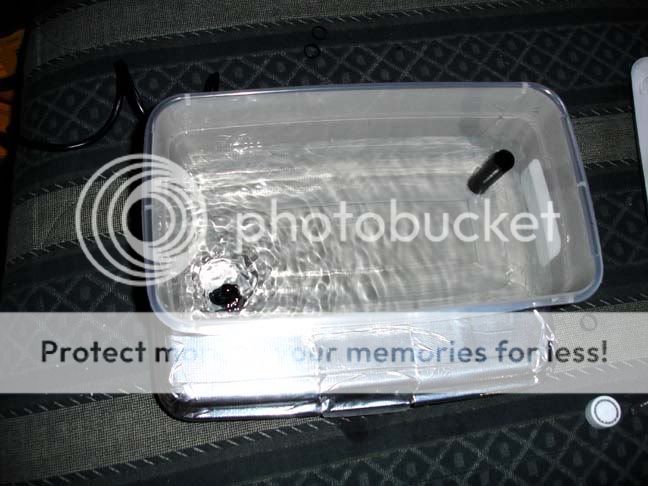
Will be using a plastic shoe box tub for a 4 plant cloner.
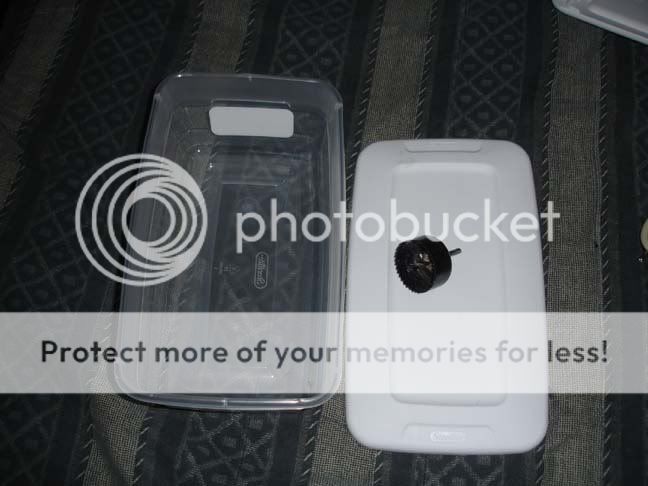
I could have drilled out 6 holes, but 4 is all I need.
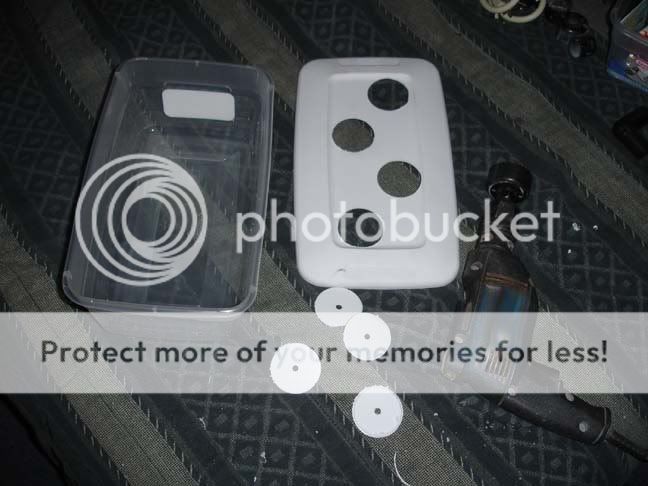
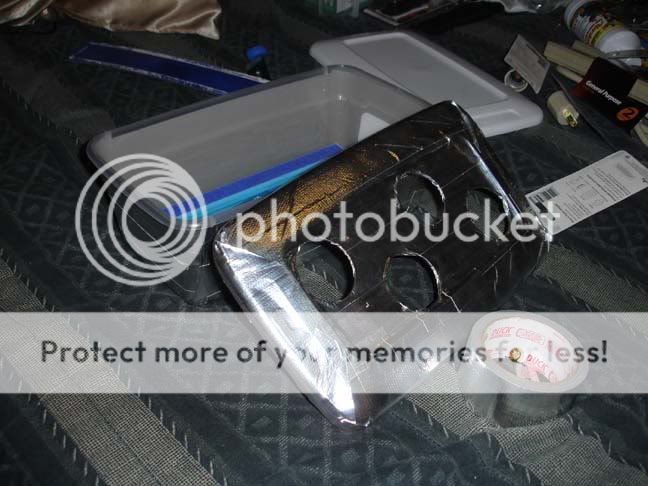
The cloner will be DWC with an air pump feeding an airstone to oxygenate the solution. All the bubbles popping on the surface creates a fine mist giving it an aeroponics effect. Clones love that. The small tub has been completely covered with reflective chrome duct tape to keep light out, and reflect it back into the cab.
This is a great time to germinate some beans

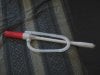
Cut a clear plastic cup. Fold and role up a paper towel in the cup. Place 5 beans between the side of the cup and the paper towel. Add some water and keep it in a warm and dark place. Sneaking a peak everyday to add water and check for tap roots.


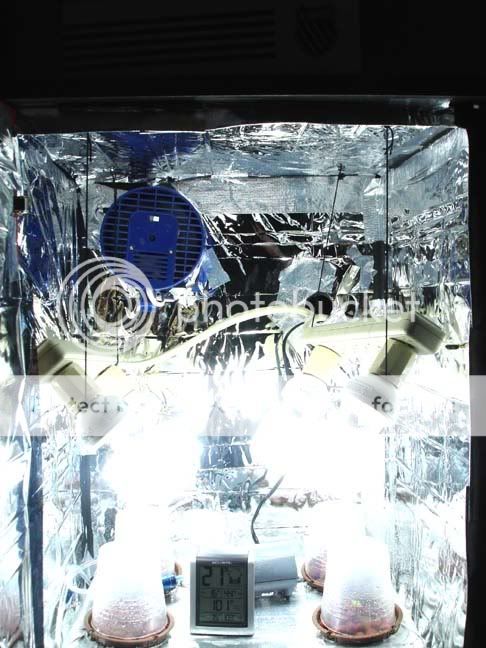
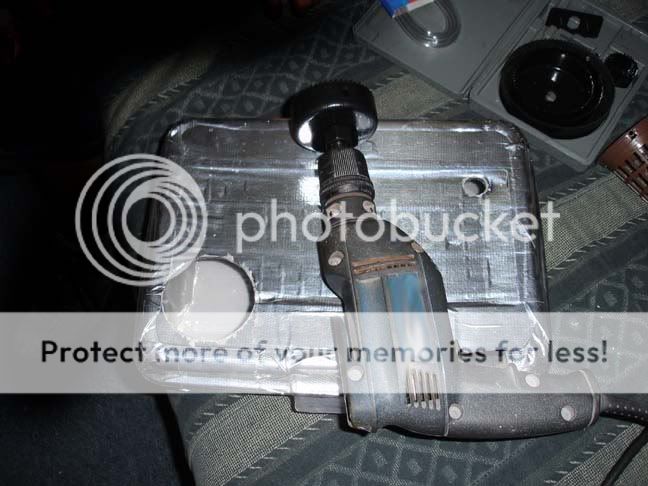
Drilled out a hole for and exhaust fan, I may add another later. Also a utility hole for the cables. Also put in the lights... As of now I will be using 4 24w daylight cfl's I have 2 extras in case I need them or to have quick replacements in case one burns out. Later when I change this chamber to budding I will be replacing them with soft white cfl's, and move the daylight cfl's down to the clone/mother chamber. As you can tell my cab will be easily adapted as things progress.

Wow those cfl's are bright. I was starting to doubt my cfl theory but after turning them on for the first time, I'm sure things will turn out just fine. It doesn't seem like heat will be a problem eather. I may not have to add a 2nd exhaust fan after all. Not sure if you can see in the pic, but I have also made a simple screen using paint mixing sticks and nylon black thread. I used the shelf as a template, and the existing shelf pins to hold it in place. You can also see the cloner in the lower chamber, it's a perfect fit.. the mother will be in a soil pot next to it.
Test fitting the tubs I will be using for the ebb/flow unit, and I'm all ready seeing a hight/space problem. This may force me to change my design, but for now I will finish it just as a learning experience =].

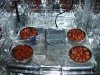
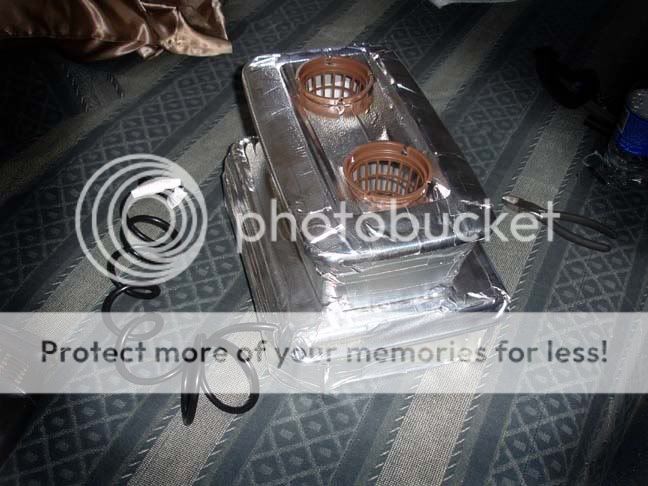
Using another shoe box bin for the flood unit with 2 plants. Using 3" net pots

I used a shorter but wider "pencil box" bin for the solution reservoir. Notice the flap door I cut out for adding nute's and checking ph. A small marine pump will pump the solution to the flood unit, plugged in to a timer set to turn on every hour for 15min's each hour.

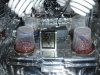
here you can see the flood unit on top of the reservoir. On the left is the flood and drain tube coming up from the pump. On the right is the overflow tube the controls the flood level.

In action
The overflow tube.. notice the little v notches. these help regulate the flow, and keep everything quite.

All put together, and in place..unfortunately I have decided to change the design and will be taking the whole unit apart do to space. =[ But will keep the design in mind for future grows. =]
ah, and the miracle of life begins =]
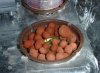
I noticed this little tap root just a day after placing the seeds in the cup. The next day 2 others cracked.. Things are moving on nicely =]

Changing the design of the grow, seedlings well on there way, and supplies unavailable for at least anther week, when I head back into the city. I do with what I have... I will be using the reservoir as a temp 4 plant dwc unit. I removed the marine pump and replaced it with the airstone/airpump from the cloner unit.
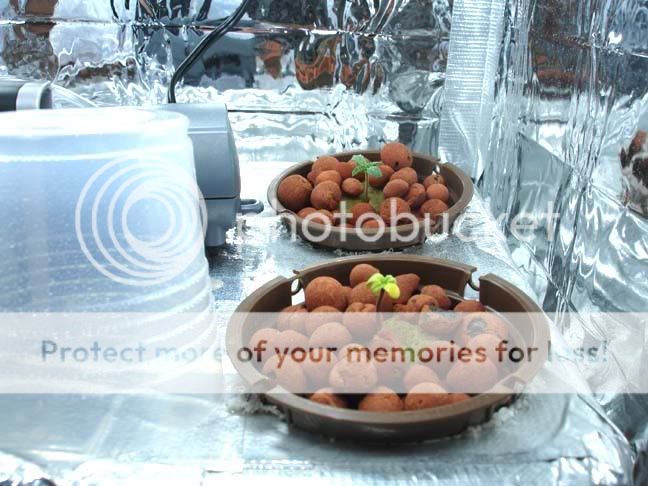
I also turned the flood unit into a 2 plant dwc unit. It will have it's own air stone. It fits nicely in the budding chamber. In fact I will be adding another side by side, giving me 4 plants in the budding chamber though it may be overkill, it will undoubtedly give me more bud sites. I plan to flower the clones as soon as they establish roots, keeping them short. If 4 plants prove to be too much for the space, then I will mover 2 of them to the lower half of the cab under the clone/mother chamber.
Up date... as I was typing this out, I peaked at the rest of the beans and one more has cracked.. Not sure if any more were going to crack, I placed an extra bean in the cup... as of now I have 4 out of 6 crack.. I will leave the other 2 in the cup for another couple of days, if they to crack I will give them away to a fellow medical marijuana patient =]
By the way, the seeds come from a local medical marijuana patient giving to me by a trusted 3rd party who told me they were White Widow or White Widow Cross? I will try to find out more, in aether case I am greatfull =]
I also have access to ak47 clones, if things were to go wrong with my seedlings.
So it begins...
First thing is deciding what kind of grow... I don't need much so a micro cab grow would be perfect for me... looking around the house I picked this locker cab as the base of my grow.
I'll start with the top half, which has is separated into 2 chambers by a removable and hight adjustable shelf. I plan to use the top chamber for budding and the lower chamber for a clone mother and clones. I will work on the lower half later as my grow gets going.
I'm going for stealth, small scale and ease of use not to mention low cost. A trip to the city and about a $100 later I'm ready to get creative.
Used mylar emergency blankets to coat the inside for maximum reflection.
Will be using a plastic shoe box tub for a 4 plant cloner.
I could have drilled out 6 holes, but 4 is all I need.
The cloner will be DWC with an air pump feeding an airstone to oxygenate the solution. All the bubbles popping on the surface creates a fine mist giving it an aeroponics effect. Clones love that. The small tub has been completely covered with reflective chrome duct tape to keep light out, and reflect it back into the cab.
This is a great time to germinate some beans
Cut a clear plastic cup. Fold and role up a paper towel in the cup. Place 5 beans between the side of the cup and the paper towel. Add some water and keep it in a warm and dark place. Sneaking a peak everyday to add water and check for tap roots.
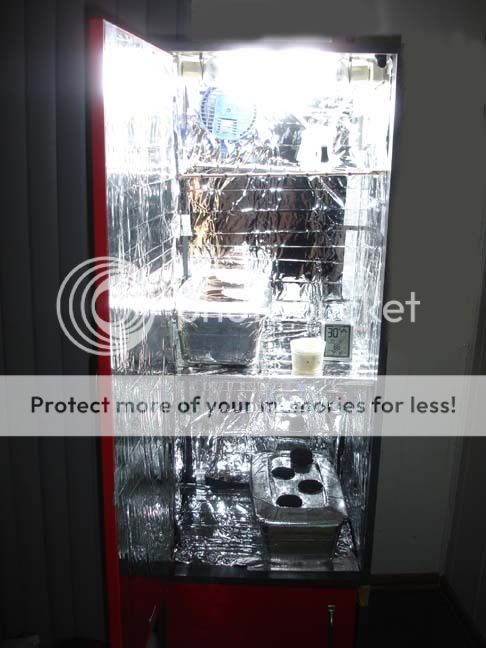
Drilled out a hole for and exhaust fan, I may add another later. Also a utility hole for the cables. Also put in the lights... As of now I will be using 4 24w daylight cfl's I have 2 extras in case I need them or to have quick replacements in case one burns out. Later when I change this chamber to budding I will be replacing them with soft white cfl's, and move the daylight cfl's down to the clone/mother chamber. As you can tell my cab will be easily adapted as things progress.
Wow those cfl's are bright. I was starting to doubt my cfl theory but after turning them on for the first time, I'm sure things will turn out just fine. It doesn't seem like heat will be a problem eather. I may not have to add a 2nd exhaust fan after all. Not sure if you can see in the pic, but I have also made a simple screen using paint mixing sticks and nylon black thread. I used the shelf as a template, and the existing shelf pins to hold it in place. You can also see the cloner in the lower chamber, it's a perfect fit.. the mother will be in a soil pot next to it.
Test fitting the tubs I will be using for the ebb/flow unit, and I'm all ready seeing a hight/space problem. This may force me to change my design, but for now I will finish it just as a learning experience =].
Using another shoe box bin for the flood unit with 2 plants. Using 3" net pots
I used a shorter but wider "pencil box" bin for the solution reservoir. Notice the flap door I cut out for adding nute's and checking ph. A small marine pump will pump the solution to the flood unit, plugged in to a timer set to turn on every hour for 15min's each hour.
here you can see the flood unit on top of the reservoir. On the left is the flood and drain tube coming up from the pump. On the right is the overflow tube the controls the flood level.
In action
The overflow tube.. notice the little v notches. these help regulate the flow, and keep everything quite.
All put together, and in place..unfortunately I have decided to change the design and will be taking the whole unit apart do to space. =[ But will keep the design in mind for future grows. =]
ah, and the miracle of life begins =]
I noticed this little tap root just a day after placing the seeds in the cup. The next day 2 others cracked.. Things are moving on nicely =]
Changing the design of the grow, seedlings well on there way, and supplies unavailable for at least anther week, when I head back into the city. I do with what I have... I will be using the reservoir as a temp 4 plant dwc unit. I removed the marine pump and replaced it with the airstone/airpump from the cloner unit.
I also turned the flood unit into a 2 plant dwc unit. It will have it's own air stone. It fits nicely in the budding chamber. In fact I will be adding another side by side, giving me 4 plants in the budding chamber though it may be overkill, it will undoubtedly give me more bud sites. I plan to flower the clones as soon as they establish roots, keeping them short. If 4 plants prove to be too much for the space, then I will mover 2 of them to the lower half of the cab under the clone/mother chamber.
Up date... as I was typing this out, I peaked at the rest of the beans and one more has cracked.. Not sure if any more were going to crack, I placed an extra bean in the cup... as of now I have 4 out of 6 crack.. I will leave the other 2 in the cup for another couple of days, if they to crack I will give them away to a fellow medical marijuana patient =]
By the way, the seeds come from a local medical marijuana patient giving to me by a trusted 3rd party who told me they were White Widow or White Widow Cross? I will try to find out more, in aether case I am greatfull =]
I also have access to ak47 clones, if things were to go wrong with my seedlings.